

Connecting with people … with accessible art
Creating art that is accessible is always a great goal. Connecting with people is always a wonderful activity. Combining these will bring smiles to faces and make for happiness.
In the many ways to make photographic art accessible, prints - posters - books, greeting cards are a way to send the gift of art while connecting with others is a positive way. Making photographic greeting cards can be many faceted - from ordering cards online with your own images to photographic wet processing cards from scratch using classic print making processes from the 1850s.
Here I describe my process for creating greeting cards from scratch - using several aforementioned 19th Century print making techniques and modern day photographic printers to forge beautiful and engaging greeting cards.
Simply print, cut, and fold the card. Super easy - with the devil in the details of course.
Executive Summary Up Front
Graphic Layout
- A background image containing crop and fold marks will greatly assist with repeatable card quality
- A common shell for a set of images will reduce mistakes and simplify file management
- Choose a standard card size to fit into an equivalent sized envelope.
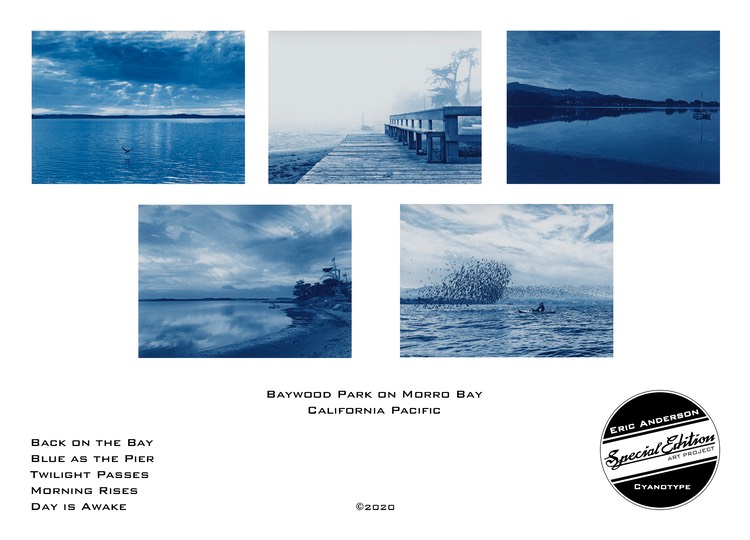
- Include an index card showing all images if the cards belong to a set
Burnishing the Fold Line
- Folded greeting cards require a burnished the fold line.
- Stack the unfolded card face down on top of a damp paper towel on top of a sheet of watercolor paper.
- Run a rolling burnisher along the fold line on the inside of the card, making a good moist indent for the card to fold into.
- When folded the damp fold line will prevent jagged cracking of the card media at the fold, producing a clean aesthetic.
Introduction
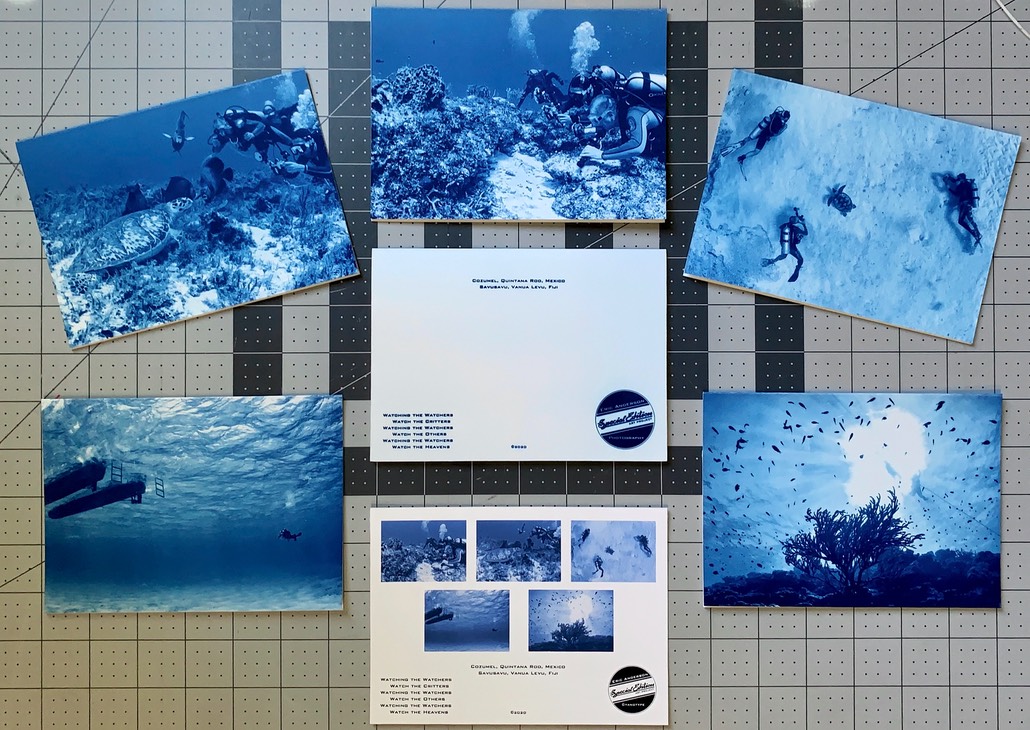
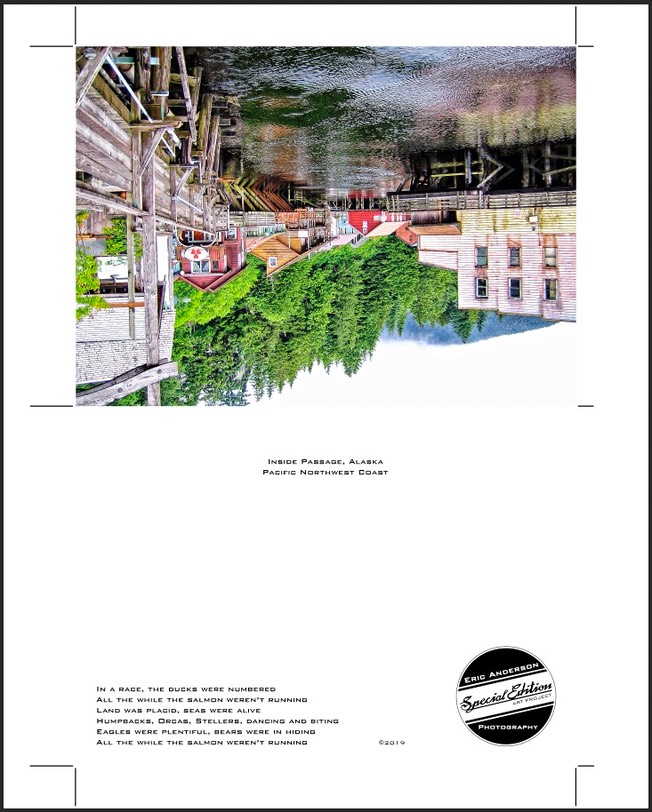
In my case greeting cards are created in sets. Each set carries a short poem relevant to the images, a title or location of the set, and my logo seal. I find this makes the cards a little more personal and engaging.
The cards stock must be both printable via the creation medium I’ll be using as well as printable via pencil, ink, or other by the sender of the greeting card. This last bit is important since if you can’t write a message on the inside what use are these as greetings! I include envelopes and postage stamps with each set of cards - a writing implement is left as an exercise to the sender.
For wet and inkjet photographic print making I’ve settled on a couple of paper types:
- Bergger COT320: This for Simple Cyanotype and Platinum/Palladium prints
- Hahnemühle Platinum Rag: This for Platinum/Palladium prints
- Hahnemühle Photo Rag Baryta: This for photographi glossyc inkjet prints
- Hahnemühle Photo Rag Ultra Smooth: This for photographic matte inkjet prints
All of these papers work wonderfully for their respective print process and allow handwritten messages on the back side for the aspiring writers and greeters of the world. With a little moisture at the fold crease, these papers do not tatter when folded.
I’ve tried pre-scored fold marked greeting card stock from various vendors - they just don’t stand up to the feel of the above noted papers and the fold scoring can not reliably be aligned to the image when printed due to feed alignment tolerances. Best to make your own cards from scratch.
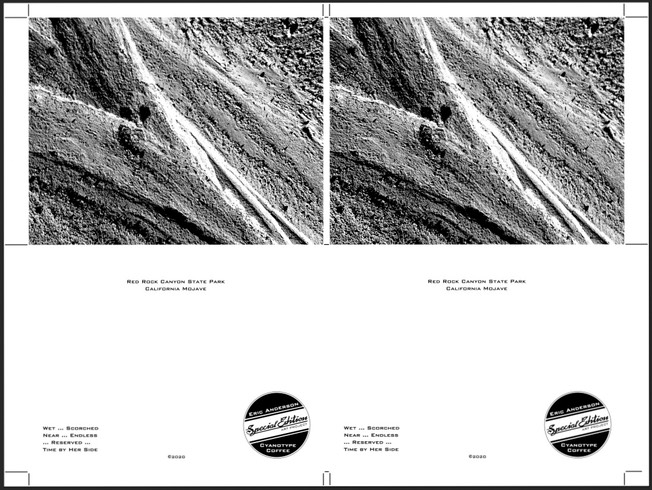
After experimenting with various size cards I’ve settled on A2 and A6 sized folding cards, 5.5”x4.25” and 6.25”x4.5” folded respectively. When finished, these cards fit nicely in their A2/A6 envelopes ready for mailing. The A2 size can be printed 2-up on a 9x12 sheet of media. The A6 cards can be printed 1-up on an 8x10 sheet or a pair created by cutting an 11x14 sheet in half. All very convenient.
Pre-Processing
Once a set of images have been chosen to go along with their specific short poem, it is time to develop and size the images for their specific print making process, the aesthetic I’m going after, and targeted card size (A2 or A6). I develop the set of images to have a similar look so as to better fit within a set. This could be making the images B&W for use in wet photographic printmaking, vibrant colors for use on high-gloss paper, or muted to have a certain feel when printed on matte stock.
Once the images are developed and sized, it’s time to build up the shell used for printing the greeting cards themselves. This shell is a multilayered Photoshop file that contains the various parts of the card itself. First is the overall background of the printed card that includes the layup crop marks and the location of the score line for the eventual fold. Within the crop marks there is the card shell itself that includes the front and back of the greeting card. This shell contains the pre-built card back information - poem, logo seal, and card title/location. The card front of the shell is where the image is placed. By adding the full compliment of images into this layered file you can have your card set all in one place as the set is using a common card shell.
This full card set file will also contain all the layers needed to create a digital negative if that is your intent. Quite convenient this - I’ve got a card file that has both a color image set a and a platinum/palladium digital negative set. Just turn on/off various layers to print the set you intend to create. When printing your cards, simply turn on/off the individual images to create each card print.
Processing
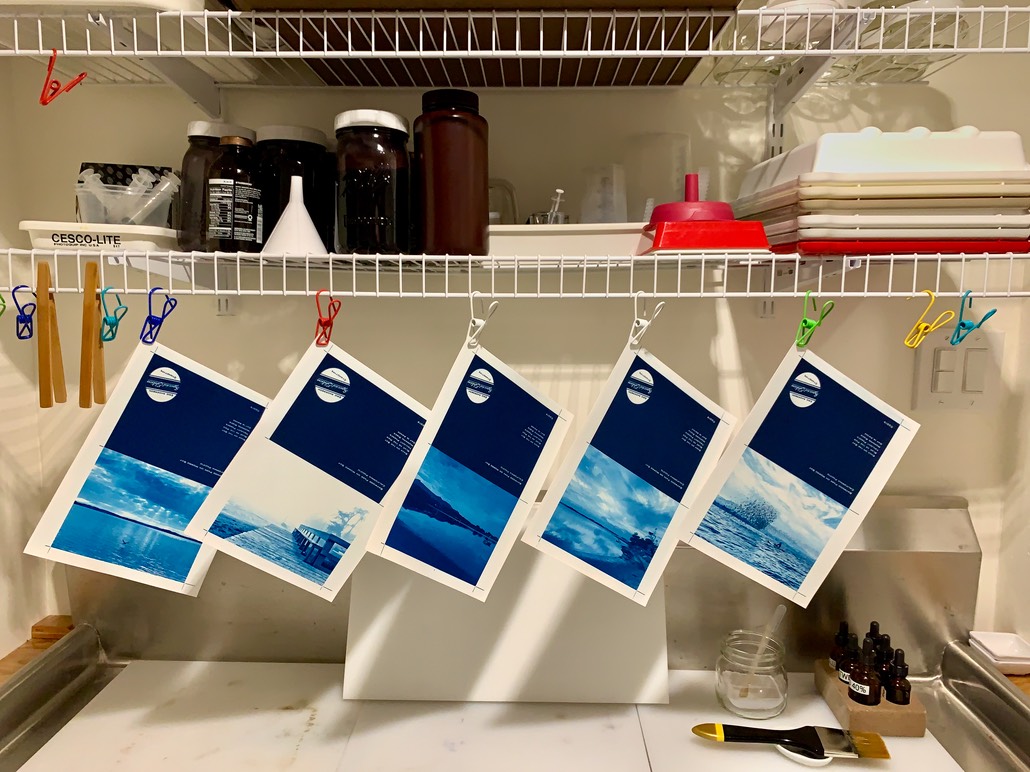
Print the cards! Allow the cards to dry flat before moving on. In addition to the cards themselves, I also create an index card containing all the images of the set, the poem, location/title, and logo seal. It’s these little details that make all the difference.
Post-Processing
Once the cards have been printed and dried, it’s time to cut and fold the individual cards. First things first however. Notice how I’ve marked where the score line needs to be. I’ve found this is really the burnishing line - a rolled burnish at that - and I’ve found it needs to be burnished on the inside of the card to make for a perfect fold. Notice also that the burnish marks for the burnish line is on the front of the card with the crop marks. Yah. About that.
Burnishing: This part seems so easy, yet it is a bit involved. Without burnishing the fold area you risk (no, really, you will actually) damaging the card at the fold line. The paper will split and become ragged at the fold. This is especially true with inkjet papers. Ok, also true with wet processed photographic papers where the image will crumble at the fold. Burnishing is simply a fact of life when creating folded greeting cards.
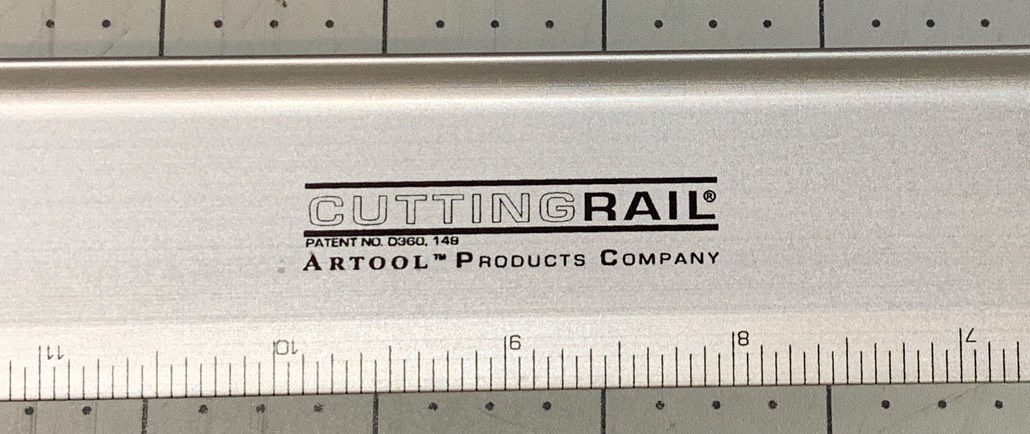
First things first. With an X-ACTO knife, cut a short line on the burnishing marks on the front of the card. These need to be visible from the back of the card and will be where you align the cutting rail for the burnishing tool to run along. My favorite cutting rail? The ‘Cutting Rail’ by Artool.
How best to burnish? I started with a synthetic bone burnisher but found it damaged the paper as it was dragged along the cutting rail. As well, the paper itself did not get a good indented fold line. Two problems to solve here, so let’s tackle creating a good fold line first.
The issue here is that the paper does not have enough ‘give’ to create an indented fold line when burnished on a standard self-healing art board - the indent for the fold is simply not sufficient. The solution here is to place a sheet of watercolor paper under the card to allow a cushion for the burnishing to make a good indent in the card for the fold. Perfect! Problem solved. Nope. Turns out fine art papers still crack and fray when folded, even though there is a very nice burnished indent to fold against. Ok, so let’s add a damp high strength paper towel (like a sturdy white paper or bamboo fiber shop towel - the blue stuff might bleed into the print).
Burnishing the card on top of a damp (not wet!) paper towel on top of a sheet of watercolor paper provides a good amount of ‘give’ to create a nice indented fold line and wets the fold line just enough to prevent the paper from cracking at the fold. Perfect. Just need to get to that folding before the paper dries out.
Now back to the first burnishing issue - damage due to dragging the burnishing tool along the paper. After trying several different burnishing tool materials, I decided that dragging a static tool along the paper was simply not the best method of choice.
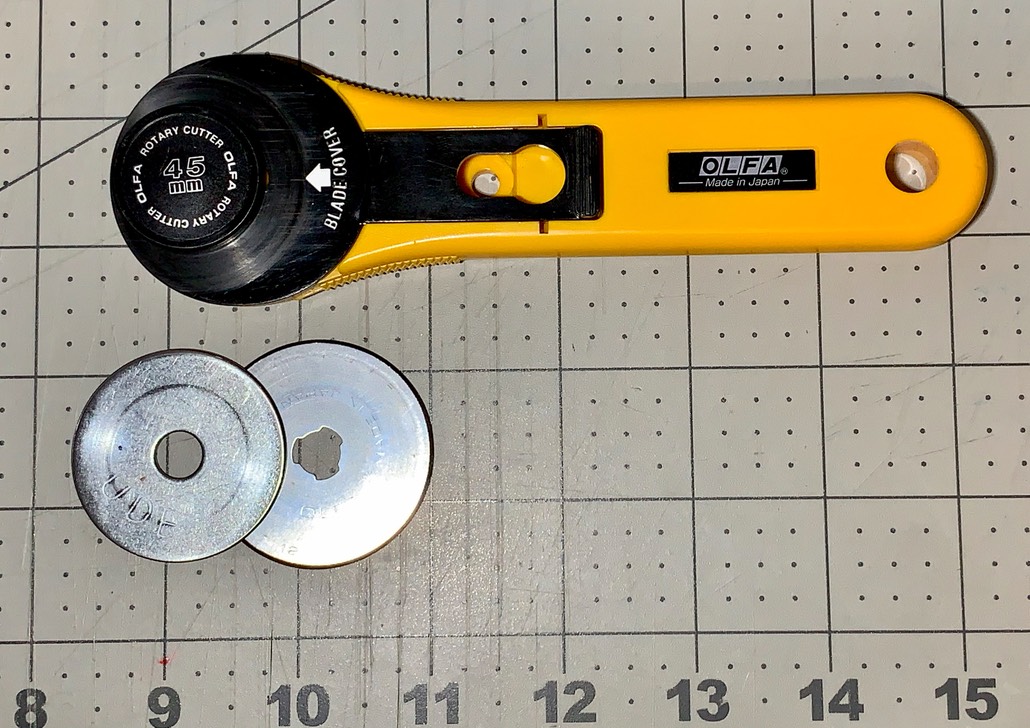
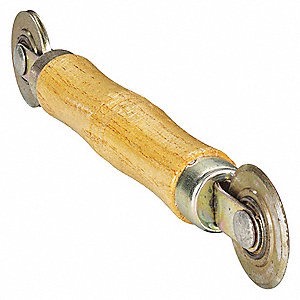
Seeing as I have a cutting wheel to use in places where dragging an X-ACTO blade is less effective, the same tooling idea can be used here - a rolling burnishing tool. Turns out there are no rolling burnishing tools. I looked into window screen installation tools, but these all proved too wobbly and clumsy to deal with. Best to go custom.
I decided to repurpose the roller cutting tool, I just needed a burnishing wheel for it - and found a nice fender washer at a hardware store that did the trick. The fender washer is 1 5/8” round with a 3/8” center hole. The center hole is just about perfect for my 45mm cutter, and the 1 5/8” diameter is just a tad smaller than the cutting wheel, but perfectly serviceable in the tool handle - best not to go with a smaller diameter however. The thickness of the washer is perfect as well at 1.35mm. Not too thin and not too thick. It needs to fasten into the cutting wheel handle and not cut the paper after all.
Any more to it? Well, yes, there is. The fender washer needs to have it's edge beveled to produce a nice burnished fold mark. Not too sharp or it will simply be a cutting wheel, not to square or it will, well, be a cutting wheel. The edge of the washer needs to be rounded just right. A file and sandpaper are your friends here, and an electric drill can help if you attach a bolt to the washer with two nuts and secure said bolt in the drill - makes for a nice simple lathe as it were.
I run the burnishing wheel three or so times on the back of the cards (on top of the damp paper towel and watercolor paper), drawing the wheel toward me along the cutting rail so I get a good indented straight fold mark.
Very Good Toolage:
Not So Good Toolage:
Cutting: The crops marks are where the card is cut out. To do this, pull out your X-ACTO knife & cutting rail again and just inside the crop marks make the cuts - just enough to capture the card but not so much as you cut the entire side of the paper off - you need the other crop marks to continue. Start on one side and cut each side accordingly. The card will fall out of the middle of the full sheet when finished. In my layout, cutting just inside the crop marks assures the card image is without white lines from outside the printed card area to produce a full bleed image.
Folding: Before the fold mark in the paper fully dries from the burnishing operation, fold the card squarely, perfectly matching the bottom and side edges. Without rubbing the fold and damaging the printed image, gently press the fold semi-tight with your palm for even pressure distribution. Once you have cut and lightly folded the entire set of, say, six cards, stack the cards squarely and using your palm press the fold of the stack tight. Flip the stack and do the same on the back of the cards. You can also use your cutting edge in lieu of your palm to get an even pressure along the width of the card stack. The trick here is not damaging the image side of the card while producing a flat level tight fold. Practice makes more perfect.
Finishing
Congratulations, you now have a beautiful set of greeting cards.
Now what? I will generally package the cards up in sets, with an index card, envelopes and postage stamps, in an appropriately sized box, for family, friends, auction donations, or personal use to connect with friends and family, sharing my stories with these beautiful works of art.

References
Special Edition Art Project
https://specialeditionartproject.com
Special Edition Art Project - Simple Cyanotype Greeting Cards
https://specialeditionartproject.com/the-special-edition-art/making-of-the-arts/world-cyanotype-day.html
Special Edition Art Project - Paper Survey
https://specialeditionartproject.com/the-special-edition-art/special-edition-pressworks-/siderotype-paper-survey--.html
Special Edition Art Project - Process User Guide
https://specialeditionartproject.com/the-special-edition-art/special-edition-pressworks-/processes-user-guide---free.html
Greeting Card Boxes
https://www.clearbags.com
Papers & Tools
Most of your favorite art and hardware supply stores